A few months ago I started learning a new instrument: the hammered dulcimer. It is a trapezoidal, wooden sound board with strings across the top that are played with small, handheld hammers. I have been taking some group and private lessons locally, but this month I joined a virtual event with some extra classes for it, too. Figured it was time to summarize my evolving understanding and some learnings.
Musical Instrument
There are several different types of dulcimers around the world, but I'm learning with the conventional, diatonic tuning of Western/European hammered dulcimers. As I get started, I am renting a Cloud Nine 15/14 Model (built in 2002) which looks like the following...
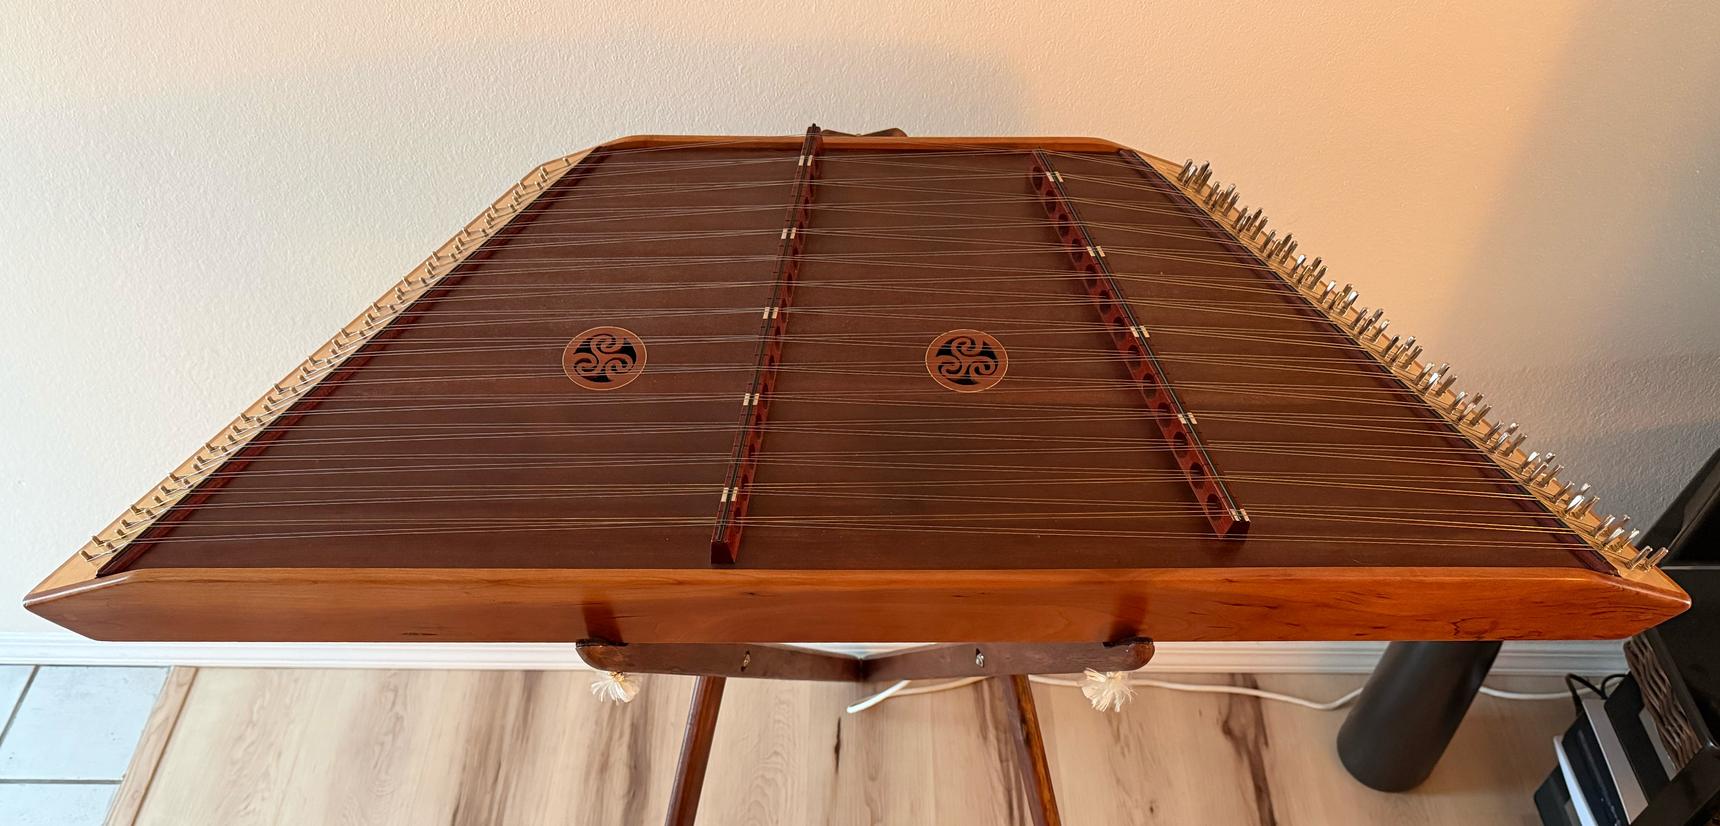
The percussion-string instrument is manufactured with different sizes - the "15/14" part in my model indicates it has 15 treble and 14 bass string courses. The "string course" refers to each set of strings being tuned since there are two strings for each. The bass strings span the entire dulcimer to achieve the lower notes, and the treble strings cross the treble bridge and have tuned notes on both sides.
In simple ASCII art, the tuning looks like the following. The plus signs along the vertical bridges represent the marked, typically-white labels along the bridge.
                      --------------------------------------
 1                   /          D  |  G            C  |     \
 2                  /           C  +  F           Bb  +      \
 3                 /            B  |  E            A  |       \
 4                /             A  |  D            G  |        \
 5               /              G  +  C            F  +         \
 6              /              F#  |  B            E  |          \
 7             /                E  |  A            D  |           \
 8            /                 D  +  G            C  +            \
 9           /                 C#  |  F#           B  |             \
10          /                   B  |  E            A  |              \
11         /                    A  +  D            G  +               \
12        /                    G#  |  C#          F#  |                \
13       /                     F#  |  B            E  |                 \
14      /                       E  +  A            D  +                  \
15     /                       D#  |  G#                                  \
      ----------------------------------------------------------------------
For regular practice and skills, I have been going through the lesson book, You Can Teach Yourself Hammered Dulcimer by Madeline MacNeil.
Box Layout
While the notes ascend along each bridge, the hammered dulcimer has interesting, smaller "box" layouts which are commonly referenced. For example, starting from musical-middle C along the bass bridge, you can either (a) ascend 7 notes to the next octave, or (b) ascend 4 before crossing "the valley" to the treble bridge and ascending the next 3 notes. For example...
 5               /                 +  C       /<   F  +         \
 6              /                  |  B      /     E  |          \
 7             /                   |  A     /      D  |           \
 8            /                    +  G   </     » C  +            \
Or, instead of crossing the valley, the box layout also works when crossing the treble bridge. For example, when starting from G you ascend 4 notes, drop back down to cross the bridge, and ascend the next 3 notes.
 5               /              G  +< C               +         \
 6              /              F#  |  B               |          \
 7             /                E  |  A               |           \
 8            /                 D <+  G «             +            \
These are just two examples. The box layouts start from any of the marked labels along the bridge. On my instrument this means there are 8 boxes.
Chords
With only two hands, each with a hammer, you can only hit two notes at once, in general. Unlike a piano where many keys can be pressed at once, chords in hammered dulcimers are typically arpeggiated, or rolled, with each note of the chord, from lower to higher, being played in quick succession.
I have been learning chords based on the box layout. The following diagram switches the notes for generic numbers where 1 on the right, bass bridge represents middle C.
 5               /                 +  1+           4  +         \
 6              /                  |  7            3  |          \
 7             /                   |  6            2  |           \
 8            /                    +  5            1  +            \
 9           /                     |              -7  |             \
Or, again, as an example that the box layout can be translated onto the treble bridge...
 5               /             +1  +  4               +         \
 6              /               7  |  3               |          \
 7             /                6  |  2               |           \
 8            /                 5  +  1               +            \
 9           /                     |  7-              |             \
Chords, apparently, are sometimes represented by Roman numerals. On the hammered dulcimer, the following common major chords are:
- Chord I is 1, 3, 5. From middle C, that is C, E, G. From G, that is G, B, D.
- Chord IV is 1, 4, 6. From middle C, that is C, F, A. From G, that is G, C, E.
- Chord V is –7, 2, 5. From middle C, that is B, D, B. From G, that is F#, A, D.
Once you memorize the numeric sequences or hammering shapes, it becomes easy to translate them across the board to start from any of the boxes. And, of course, the chords can be repeated up and down the board's notes for longer scales.
Comments