I wanted to investigate an API used by one of my iPhone's apps. I used the following configuration to intercept the encrypted server connections and investigate its data communications.
- Linux host to act as the virtual network gateway.
- mitmproxy for the core "man-in-the-middle" (MITM) traffic interception.
- Tailscale for routing all traffic from the device through the MITM gateway.
Gateway Setup
I created a new virtual machine to help keep this experiment self-contained. I happened to use Ubuntu Server 24.04 LTS with the default, standard installation. On first boot, I ran upgrades for good measure.
$sudo apt upgrade -yOutput
Reading package lists... Done Building dependency tree... Done Reading state information... Done Calculating upgrade... Done The following packages will be upgraded: bind9-dnsutils bind9-host bind9-libs cloud-init coreutils fwupd landscape-common libfwupd2 powermgmt-base python3-software-properties software-properties-common systemd-hwe-hwdb ubuntu-drivers-common 13 upgraded, 0 newly installed, 0 to remove and 0 not upgraded. Need to get 8,443 kB of archives. After this operation, 89.1 kB of additional disk space will be used. Get:1 http://us.archive.ubuntu.com/ubuntu noble-updates/main amd64 coreutils amd64 9.4-3ubuntu6.1 [1,413 kB] Get:2 http://us.archive.ubuntu.com/ubuntu noble-updates/main amd64 ubuntu-drivers-common amd64 1:0.9.7.6ubuntu3.4 [65.8 kB] Get:3 http://us.archive.ubuntu.com/ubuntu noble-updates/main amd64 systemd-hwe-hwdb all 255.1.5 [3,518 B] Get:4 http://us.archive.ubuntu.com/ubuntu noble-updates/main amd64 bind9-host amd64 1:9.18.39-0ubuntu0.24.04.1 [50.5 kB] Get:5 http://us.archive.ubuntu.com/ubuntu noble-updates/main amd64 bind9-dnsutils amd64 1:9.18.39-0ubuntu0.24.04.1 [156 kB] Get:6 http://us.archive.ubuntu.com/ubuntu noble-updates/main amd64 bind9-libs amd64 1:9.18.39-0ubuntu0.24.04.1 [1,257 kB] Get:7 http://us.archive.ubuntu.com/ubuntu noble-updates/main amd64 powermgmt-base all 1.37ubuntu0.1 [7,650 B] Get:8 http://us.archive.ubuntu.com/ubuntu noble-updates/main amd64 libfwupd2 amd64 1.9.31-0ubuntu1~24.04.1 [136 kB] Get:9 http://us.archive.ubuntu.com/ubuntu noble-updates/main amd64 fwupd amd64 1.9.31-0ubuntu1~24.04.1 [4,592 kB] Get:10 http://us.archive.ubuntu.com/ubuntu noble-updates/main amd64 landscape-common amd64 24.02-0ubuntu5.6 [93.2 kB] Get:11 http://us.archive.ubuntu.com/ubuntu noble-updates/main amd64 software-properties-common all 0.99.49.3 [14.4 kB] Get:12 http://us.archive.ubuntu.com/ubuntu noble-updates/main amd64 python3-software-properties all 0.99.49.3 [29.9 kB] Get:13 http://us.archive.ubuntu.com/ubuntu noble-updates/main amd64 cloud-init all 25.2-0ubuntu1~24.04.1 [625 kB] Fetched 8,443 kB in 1s (8,402 kB/s) Preconfiguring packages ... (Reading database ... 87044 files and directories currently installed.) Preparing to unpack .../coreutils_9.4-3ubuntu6.1_amd64.deb ... Unpacking coreutils (9.4-3ubuntu6.1) over (9.4-3ubuntu6) ... Setting up coreutils (9.4-3ubuntu6.1) ... (Reading database ... 87044 files and directories currently installed.) Preparing to unpack .../00-ubuntu-drivers-common_1%3a0.9.7.6ubuntu3.4_amd64.deb ... Unpacking ubuntu-drivers-common (1:0.9.7.6ubuntu3.4) over (1:0.9.7.6ubuntu3.2) ... Preparing to unpack .../01-systemd-hwe-hwdb_255.1.5_all.deb ... Unpacking systemd-hwe-hwdb (255.1.5) over (255.1.4) ... Preparing to unpack .../02-bind9-host_1%3a9.18.39-0ubuntu0.24.04.1_amd64.deb ... Unpacking bind9-host (1:9.18.39-0ubuntu0.24.04.1) over (1:9.18.30-0ubuntu0.24.04.2) ... Preparing to unpack .../03-bind9-dnsutils_1%3a9.18.39-0ubuntu0.24.04.1_amd64.deb ... Unpacking bind9-dnsutils (1:9.18.39-0ubuntu0.24.04.1) over (1:9.18.30-0ubuntu0.24.04.2) ... Preparing to unpack .../04-bind9-libs_1%3a9.18.39-0ubuntu0.24.04.1_amd64.deb ... Unpacking bind9-libs:amd64 (1:9.18.39-0ubuntu0.24.04.1) over (1:9.18.30-0ubuntu0.24.04.2) ... Preparing to unpack .../05-powermgmt-base_1.37ubuntu0.1_all.deb ... Unpacking powermgmt-base (1.37ubuntu0.1) over (1.37) ... Preparing to unpack .../06-libfwupd2_1.9.31-0ubuntu1~24.04.1_amd64.deb ... Unpacking libfwupd2:amd64 (1.9.31-0ubuntu1~24.04.1) over (1.9.30-0ubuntu1~24.04.1) ... Preparing to unpack .../07-fwupd_1.9.31-0ubuntu1~24.04.1_amd64.deb ... Unpacking fwupd (1.9.31-0ubuntu1~24.04.1) over (1.9.30-0ubuntu1~24.04.1) ... Preparing to unpack .../08-landscape-common_24.02-0ubuntu5.6_amd64.deb ... Unpacking landscape-common (24.02-0ubuntu5.6) over (24.02-0ubuntu5.3) ... Preparing to unpack .../09-software-properties-common_0.99.49.3_all.deb ... Unpacking software-properties-common (0.99.49.3) over (0.99.49.2) ... Preparing to unpack .../10-python3-software-properties_0.99.49.3_all.deb ... Unpacking python3-software-properties (0.99.49.3) over (0.99.49.2) ... Preparing to unpack .../11-cloud-init_25.2-0ubuntu1~24.04.1_all.deb ... Unpacking cloud-init (25.2-0ubuntu1~24.04.1) over (25.1.4-0ubuntu0~24.04.1) ... Setting up powermgmt-base (1.37ubuntu0.1) ... Setting up cloud-init (25.2-0ubuntu1~24.04.1) ... Installing new version of config file /etc/cloud/templates/sources.list.debian.deb822.tmpl ... Setting up ubuntu-drivers-common (1:0.9.7.6ubuntu3.4) ... Setting up bind9-libs:amd64 (1:9.18.39-0ubuntu0.24.04.1) ... Setting up libfwupd2:amd64 (1.9.31-0ubuntu1~24.04.1) ... Setting up landscape-common (24.02-0ubuntu5.6) ... Setting up python3-software-properties (0.99.49.3) ... Setting up systemd-hwe-hwdb (255.1.5) ... Setting up bind9-host (1:9.18.39-0ubuntu0.24.04.1) ... Setting up fwupd (1.9.31-0ubuntu1~24.04.1) ... fwupd-offline-update.service is a disabled or a static unit not running, not starting it. fwupd-refresh.service is a disabled or a static unit not running, not starting it. fwupd.service is a disabled or a static unit not running, not starting it. Setting up software-properties-common (0.99.49.3) ... Setting up bind9-dnsutils (1:9.18.39-0ubuntu0.24.04.1) ... Processing triggers for libc-bin (2.39-0ubuntu8.6) ... Processing triggers for rsyslog (8.2312.0-3ubuntu9.1) ... Processing triggers for man-db (2.12.0-4build2) ... Processing triggers for dbus (1.14.10-4ubuntu4.1) ... Processing triggers for udev (255.4-1ubuntu8.10) ... Processing triggers for install-info (7.1-3build2) ... Scanning processes... Scanning linux images... Running kernel seems to be up-to-date. No services need to be restarted. No containers need to be restarted. No user sessions are running outdated binaries. No VM guests are running outdated hypervisor (qemu) binaries on this host.
To start, configure networking to enable low-level IP forwarding features that will be needed later.
$echo 'net.ipv4.ip_forward = 1' | sudo tee -a /etc/sysctl.d/99-tailscale.conf > /dev/null$echo 'net.ipv6.conf.all.forwarding = 1' | sudo tee -a /etc/sysctl.d/99-tailscale.conf > /dev/null$sudo sysctl -p /etc/sysctl.d/99-tailscale.confOutput
net.ipv4.ip_forward = 1 net.ipv6.conf.all.forwarding = 1$printf '#!/bin/sh\n\nethtool -K %s rx-udp-gro-forwarding on rx-gro-list off \n' "$(ip -o route get 8.8.8.8 | cut -f 5 -d " ")" | sudo tee /etc/networkd-dispatcher/routable.d/50-tailscaleOutput
#!/bin/sh ethtool -K ens18 rx-udp-gro-forwarding on rx-gro-list off$sudo chmod 755 /etc/networkd-dispatcher/routable.d/50-tailscale$sudo /etc/networkd-dispatcher/routable.d/50-tailscale
To route all traffic (rather than hope the apps respect proxy settings), I used Tailscale to add the machine to my existing virtual private network.
$curl -fsSL https://tailscale.com/install.sh | shOutput
Installing Tailscale for ubuntu noble, using method apt + sudo mkdir -p --mode=0755 /usr/share/keyrings + + curl -fsSL https://pkgs.tailscale.com/stable/ubuntu/noble.noarmor.gpg sudo tee /usr/share/keyrings/tailscale-archive-keyring.gpg + sudo chmod 0644 /usr/share/keyrings/tailscale-archive-keyring.gpg + + curlsudo -fsSL https://pkgs.tailscale.com/stable/ubuntu/noble.tailscale-keyring.list tee /etc/apt/sources.list.d/tailscale.list # Tailscale packages for ubuntu noble deb [signed-by=/usr/share/keyrings/tailscale-archive-keyring.gpg] https://pkgs.tailscale.com/stable/ubuntu noble main + sudo chmod 0644 /etc/apt/sources.list.d/tailscale.list + sudo apt-get update Hit:1 http://security.ubuntu.com/ubuntu noble-security InRelease Hit:2 http://us.archive.ubuntu.com/ubuntu noble InRelease Hit:3 http://us.archive.ubuntu.com/ubuntu noble-updates InRelease Hit:4 http://us.archive.ubuntu.com/ubuntu noble-backports InRelease Get:5 https://pkgs.tailscale.com/stable/ubuntu noble InRelease Get:6 https://pkgs.tailscale.com/stable/ubuntu noble/main amd64 Packages [13.2 kB] Get:7 https://pkgs.tailscale.com/stable/ubuntu noble/main all Packages [354 B] Fetched 20.1 kB in 1s (22.0 kB/s) Reading package lists... Done + sudo apt-get install -y tailscale tailscale-archive-keyring Reading package lists... Done Building dependency tree... Done Reading state information... Done The following NEW packages will be installed: tailscale tailscale-archive-keyring 0 upgraded, 2 newly installed, 0 to remove and 0 not upgraded. Need to get 34.2 MB of archives. After this operation, 66.3 MB of additional disk space will be used. Get:2 https://pkgs.tailscale.com/stable/ubuntu noble/main all tailscale-archive-keyring all 1.35.181 [3,082 B] Get:1 https://pkgs.tailscale.com/stable/ubuntu noble/main amd64 tailscale amd64 1.88.3 [34.2 MB] Fetched 34.2 MB in 3s (12.2 MB/s) Selecting previously unselected package tailscale. (Reading database ... 87048 files and directories currently installed.) Preparing to unpack .../tailscale_1.88.3_amd64.deb ... Unpacking tailscale (1.88.3) ... Selecting previously unselected package tailscale-archive-keyring. Preparing to unpack .../tailscale-archive-keyring_1.35.181_all.deb ... Unpacking tailscale-archive-keyring (1.35.181) ... Setting up tailscale-archive-keyring (1.35.181) ... Setting up tailscale (1.88.3) ... Created symlink /etc/systemd/system/multi-user.target.wants/tailscaled.service → /usr/lib/systemd/system/tailscaled.service. Scanning processes... Scanning linux images... Running kernel seems to be up-to-date. No services need to be restarted. No containers need to be restarted. No user sessions are running outdated binaries. No VM guests are running outdated hypervisor (qemu) binaries on this host. + [ false = true ] + set +x Installation complete! Log in to start using Tailscale by running: sudo tailscale up
Once installed, run the following command to authenticate the node.
$sudo tailscale up --advertise-exit-nodeOutput
To authenticate, visit: https://login.tailscale.com/a/a1b2c3d4e5f6a7 Success. Some peers are advertising routes but --accept-routes is false
While approving and accessing the Admin Console, be sure to complete both of the following.
- Approve the machine.
- Manage the machine's Route Settings to enable Use as exit node.
From the VM, update routing to force all traffic from the Tailscale network interface to our (future) MITM port. Also, install a utility to help persist the settings across reboots.
$sudo iptables -t nat -A PREROUTING -i tailscale0 -p tcp -j REDIRECT --to-port 8080$sudo apt install -y iptables-persistentOutput
Reading package lists... Done Building dependency tree... Done Reading state information... Done The following additional packages will be installed: netfilter-persistent The following packages will be REMOVED: ufw The following NEW packages will be installed: iptables-persistent netfilter-persistent 0 upgraded, 2 newly installed, 1 to remove and 0 not upgraded. Need to get 14.3 kB of archives. After this operation, 780 kB disk space will be freed. Get:1 http://us.archive.ubuntu.com/ubuntu noble/universe amd64 netfilter-persistent all 1.0.20 [7,402 B] Get:2 http://us.archive.ubuntu.com/ubuntu noble/universe amd64 iptables-persistent all 1.0.20 [6,946 B] Fetched 14.3 kB in 0s (65.8 kB/s) Preconfiguring packages ... (Reading database ... 87053 files and directories currently installed.) Removing ufw (0.36.2-6) ... Skip stopping firewall: ufw (not enabled) Selecting previously unselected package netfilter-persistent. (Reading database ... 86958 files and directories currently installed.) Preparing to unpack .../netfilter-persistent_1.0.20_all.deb ... Unpacking netfilter-persistent (1.0.20) ... Selecting previously unselected package iptables-persistent. Preparing to unpack .../iptables-persistent_1.0.20_all.deb ... Unpacking iptables-persistent (1.0.20) ... Setting up netfilter-persistent (1.0.20) ... Created symlink /etc/systemd/system/iptables.service → /usr/lib/systemd/system/netfilter-persistent.service. Created symlink /etc/systemd/system/ip6tables.service → /usr/lib/systemd/system/netfilter-persistent.service. Created symlink /etc/systemd/system/multi-user.target.wants/netfilter-persistent.service → /usr/lib/systemd/system/netfilter-persistent.service. Setting up iptables-persistent (1.0.20) ... Processing triggers for man-db (2.12.0-4build2) ... Scanning processes... Scanning linux images... Running kernel seems to be up-to-date. No services need to be restarted. No containers need to be restarted. No user sessions are running outdated binaries. No VM guests are running outdated hypervisor (qemu) binaries on this host.$sudo iptables-save | sudo tee /etc/iptables/rules.v4 > /dev/null
Next, download and extract mitmproxy which provides the proxy tools and convenience utilities.
$wget https://downloads.mitmproxy.org/12.1.2/mitmproxy-12.1.2-linux-x86_64.tar.gz$sudo mkdir -p /srv/mitmproxy/bin$sudo tar -xzC /srv/mitmproxy/bin -f mitmproxy-12.1.2-linux-x86_64.tar.gz
Start the proxy service with mostly-default settings. I use --tls_version_client_min=UNBOUNDED to capture some additional, outdated traffic.
$sudo /srv/mitmproxy/bin/mitmproxy --set confdir=/srv/mitmproxy/etc --set tls_version_client_min=UNBOUNDED --mode transparent
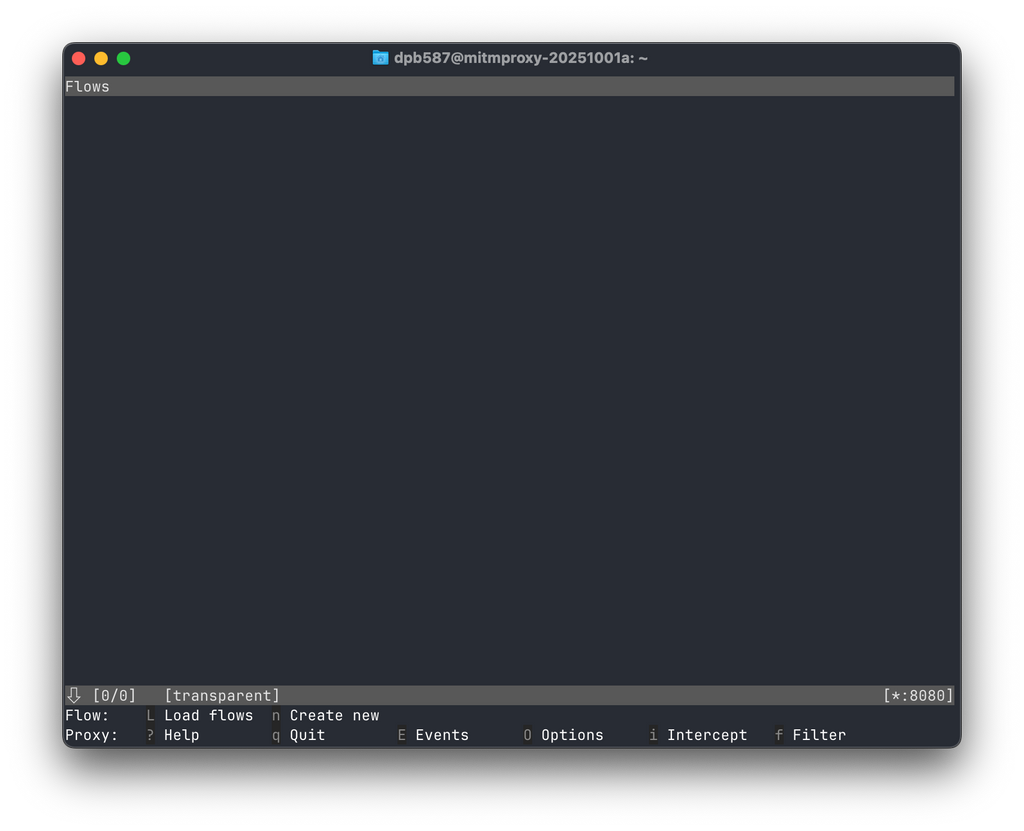
Once running, a text-based user interface (TUI) should be visible where activity will (later) appear.
iOS Setup
On the iPhone, open the Tailscale app to manage the Exit Node settings. Be sure to select the new gateway node and Enable routing.
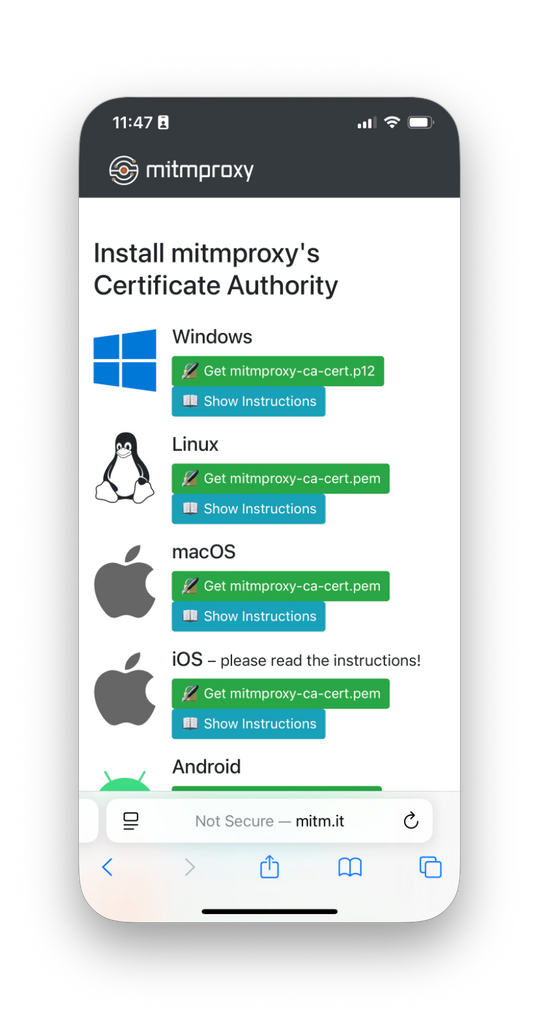
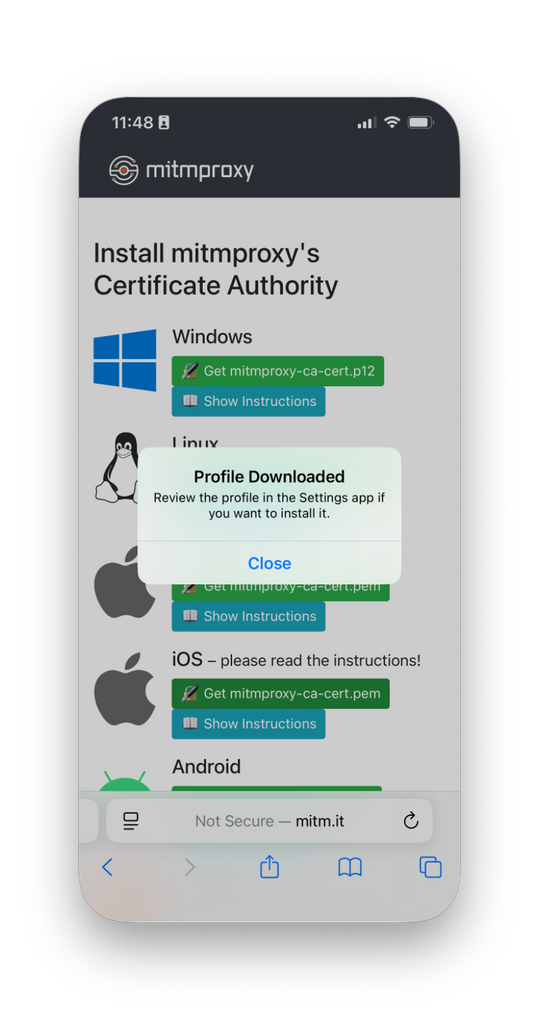
Open the Safari browser, and navigate to http://mitm.it. You should see a screen similar to the following (along with several requests appearing on the mitmproxy terminal).
Now, perform the following steps to configure the phone to trust the intercepted network traffic.
- From the web page, under the iOS heading, tap Get mitmproxy-ca-cert.pem.
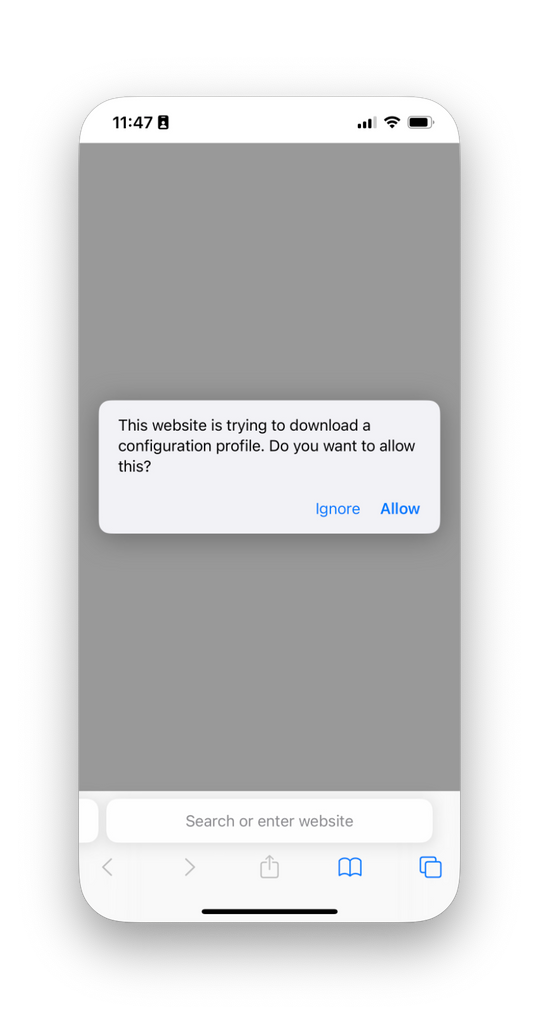
- From the security prompt, tap Allow.
- From the confirmation, tap Close.
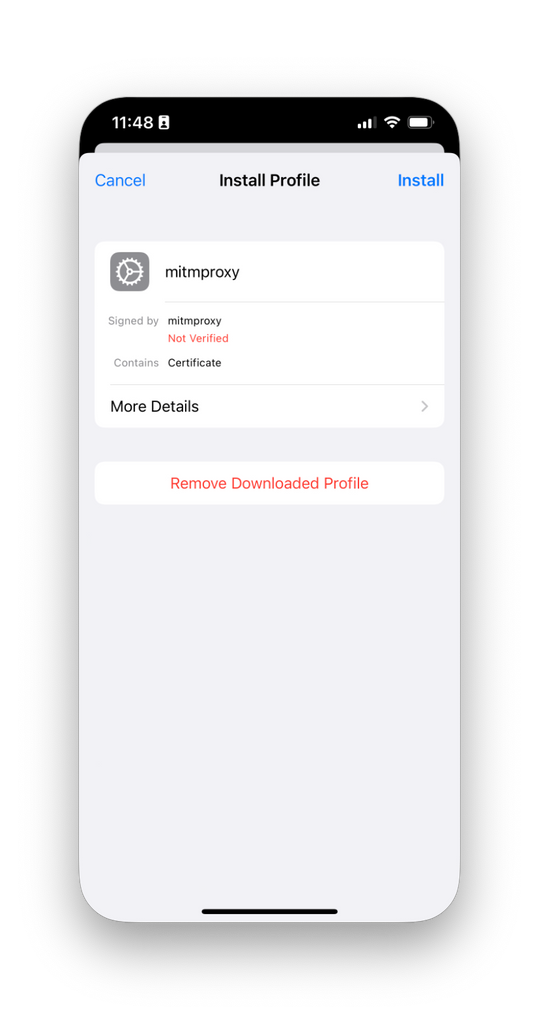
- Open the Settings app and tap Profile Downloaded.
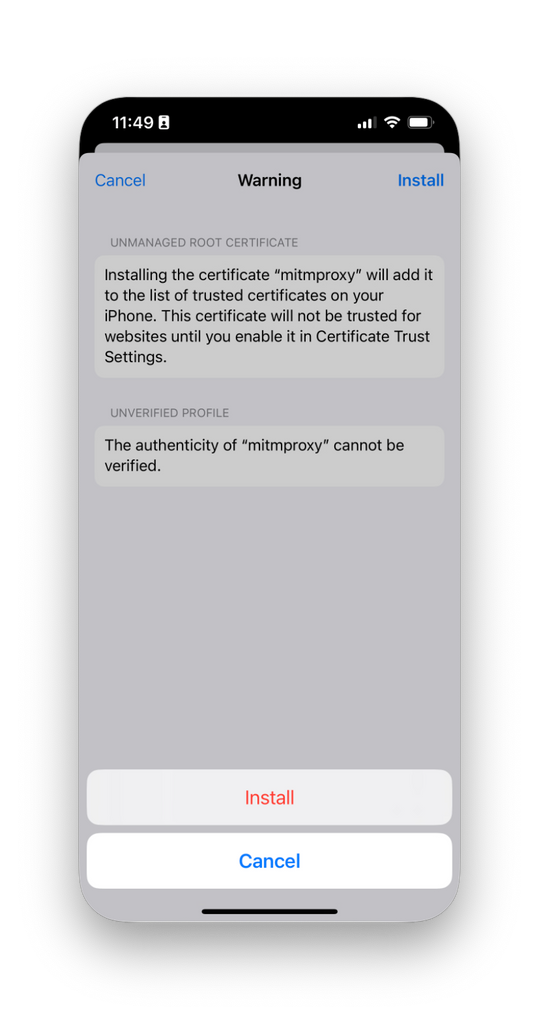
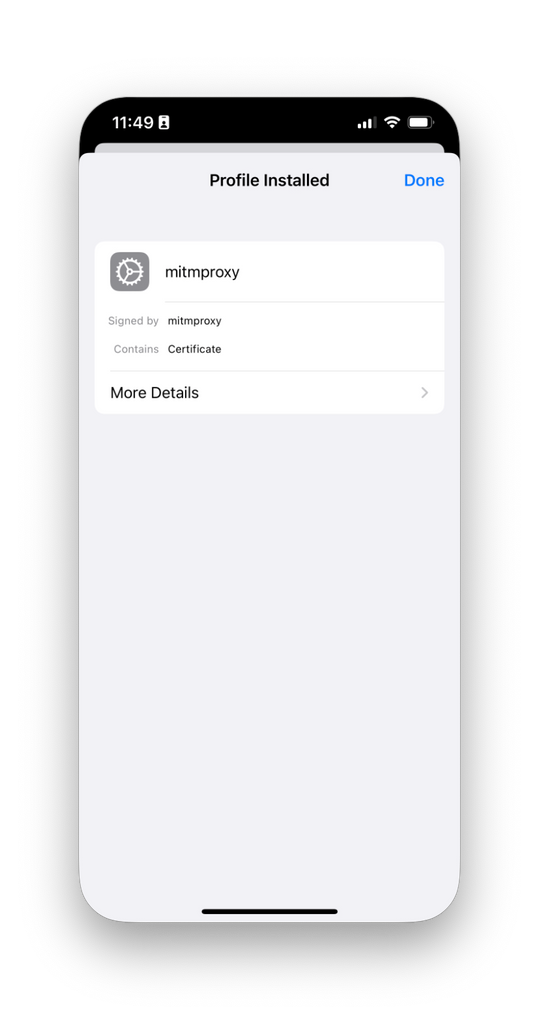
- Tap Install, and then again for the following security and confirmation prompts. Tap Done.
- From the Settings app, navigate to General, About, and then Certificate Trust Settings.
- For the new mitmproxy root certificate, enable it. Tap Continue on the security prompt.
iPhone Screenshots


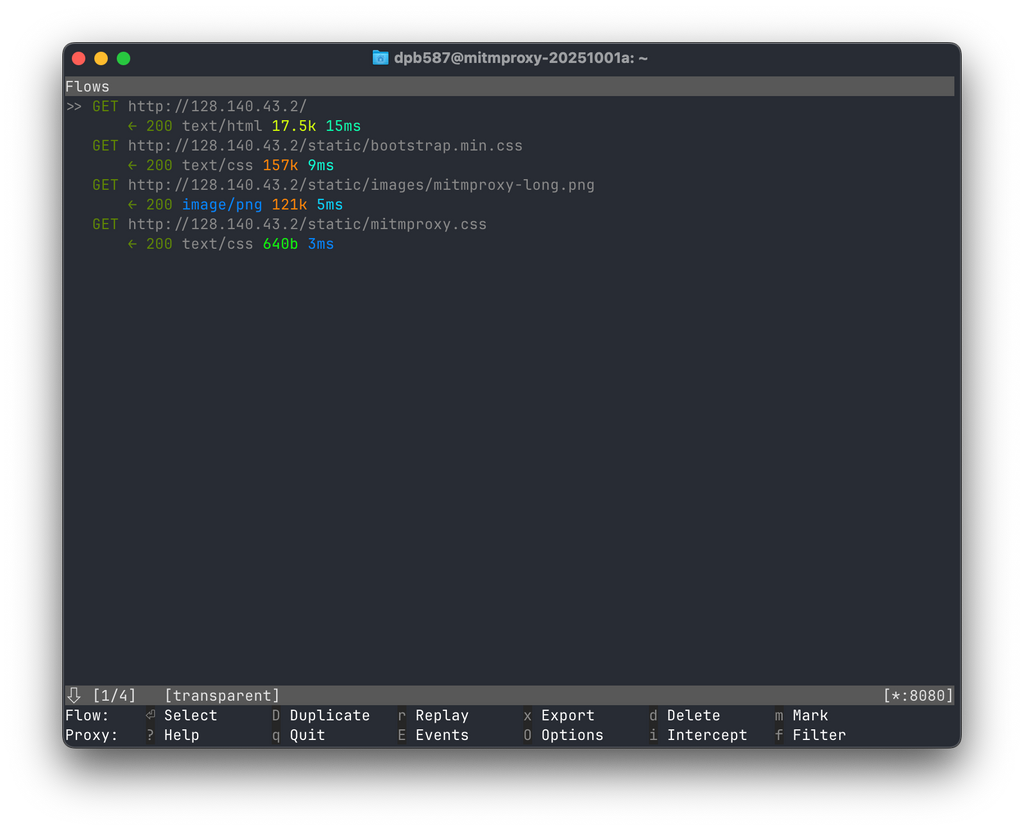
Finally, setup is complete. Open Safari or any other web-related app, and you should see numerous requests appearing on the mitmproxy terminal.
Traffic Recording
By default, mitmproxy is capturing traffic in memory and only available to review through its TUI. Terminate the running process with Ctrl-C (and typing y to confirm). Then use the --save-stream-file option for recording traffic to a file.
$sudo mkdir /mnt/mitmproxy-capture$sudo /srv/mitmproxy/bin/mitmproxy --set confdir=/srv/mitmproxy/etc --set tls_version_client_min=UNBOUNDED --mode transparent --save-stream-file=/mnt/mitmproxy-capture/demo.data
By default, all captured traffic gets recorded to the file. Filter Expressions can limit the amount of data or Addon scripts can be used for much more advanced options.
import mitmproxy

class Addon:
  def response(self, flow: mitmproxy.http.HTTPFlow):
    print(f"{flow.request.method} {flow.request.url}")
    print(f"--> {flow.response.http_version} {flow.response.status_code} {flow.response.reason}")

addons = [Addon()]
The default file format is a serialized version of the Python objects. I find it easier to do an open-ended session capture before post-processing with the mitmdump and an addon script.
$mitmdump --no-server --flow-detail 0 --scripts addon.py --rfile /mnt/mitmproxy-capture/demo.data
Notes
Certificate Pinning
A Client TLS handshake failed may mean that an app or service relies on certificate pinning and may not be available through this setup. The "pinning" behavior refers to a client expecting a specific Certificate Authority or chain to be present in the secure connection. The MITM process interrupts that metadata, so clients end up rejecting the connection attempt.
Client TLS handshake failed. The client may not trust the proxy's certificate for gateway.icloud.com (OpenSSL Error([('SSL routines', '', 'inappropriate fallback')]))
Typically these connection attempts will be closed and retried resulting in numerous warning messages. You can monitor the messages, use mitmproxy options, or research other workarounds.
Missing Activity
Some recent network connections may rely on cached metadata, so they may not immediately load correctly through the gateway. Try giving it some time, opening a new private tab, or restarting the app.
Reader Comments